UNDER CONSTRUCTION
LOL! The site to give you construction instructions for an heirloom Advent Calendar is 'under construction'. I expect to flesh out a lot more details later, but finishing the book versions and the main website as a whole will take priority. So, if these plans seem still a little vague, my apologies. I'll get deeper into this and complete it when I can. But with a tablesaw and the measurements and materials listed below, you SHOULD be able to complete one of your own. Happy constructing!
Where are the PLANS, you Rebel scum?
The information below, and pictures, relate to building your own heirloom Advent Calendar out of wood. At least, the model I made myself. I can estimate the cost, but prices fluctuate wildly, especially,
recently, lumber. The plans are here if you want to follow them.
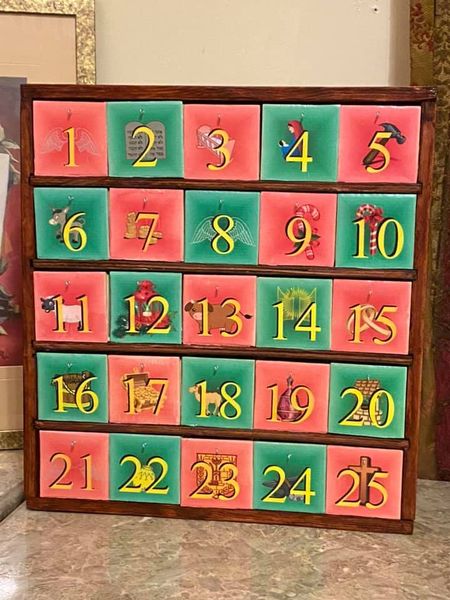
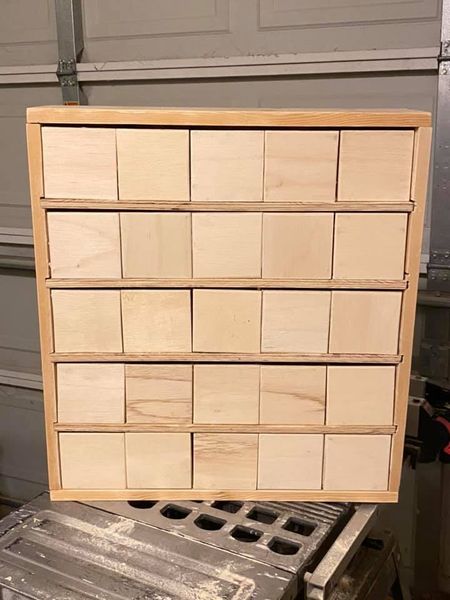
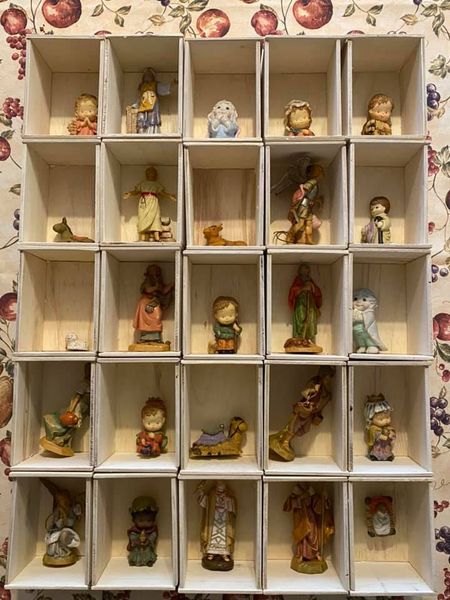
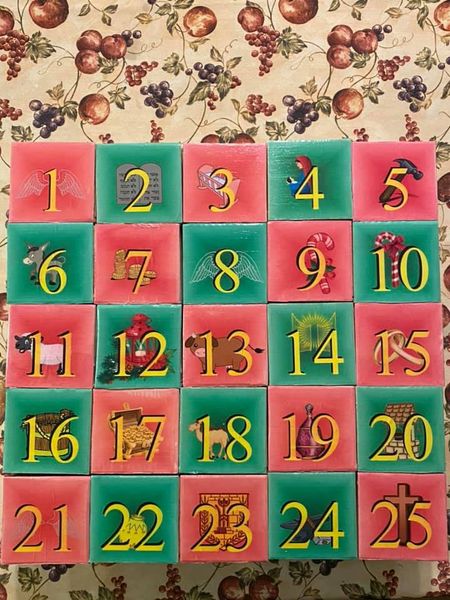
Here's a pic of the final product. Pics of assembly and such at the bottom of this page.
Equipment
| Item | Description | Step(s) Used |
|---|
| Table Saw |
To cut all wood pieces evenly |
1-4 |
| Circular Saw |
If you have no table saw |
1-4 |
| Belt Sander |
To sand the wood |
5 |
| Hand sander |
To smooth the wood |
5 |
| Hammer |
To drive finishing nails |
6 |
| color printer |
To print the door fronts |
7 |
| paintbrush |
To apply mod podge |
7 |
| paintbrush |
To apply stain |
7 |
Materials
| Item | Description | Qty | Price (11/2021) | Where Found |
|---|
| TOTALS |
TOTAL COST ALL MATERIALS |
1 |
$118.74 |
|
| 1x6x8ft pine |
pine house trim, pine, 1/2in x 6in x 8ft |
1 |
$25.26 |
HomeDepot |
| 4x8x1/4in plywood |
pine house trim, pine, 1/4in x 4ft x 8ft |
1 |
$29.92 |
HomeDepot |
| Triply Underlayment 5mmx2ftx4ft |
pine underlayment 5mm x 2ft x 4ft |
2 |
$32.16 |
HomeDepot |
| Finishing nails |
Box 1.5 in finishing nails qty 50 |
1 |
$2.10 |
HomeDepot |
| Adhesive Caulk |
Loctite Clear adhesive caulk 1 tube 6oz |
1 |
$4.97 |
HomeDepot |
| Mod Podge Gloss |
Mod Podge Gloss sealer 16 oz |
1 |
$6.99 |
Hobby Lobby |
| Gloss Pecan Stain |
Varathane poly stain 1 qt |
1 |
$14.97 |
Home Depot |
| Sandpaper Multipack |
3M 9inx11 5pk |
1 |
$2.37 |
Home Depot |
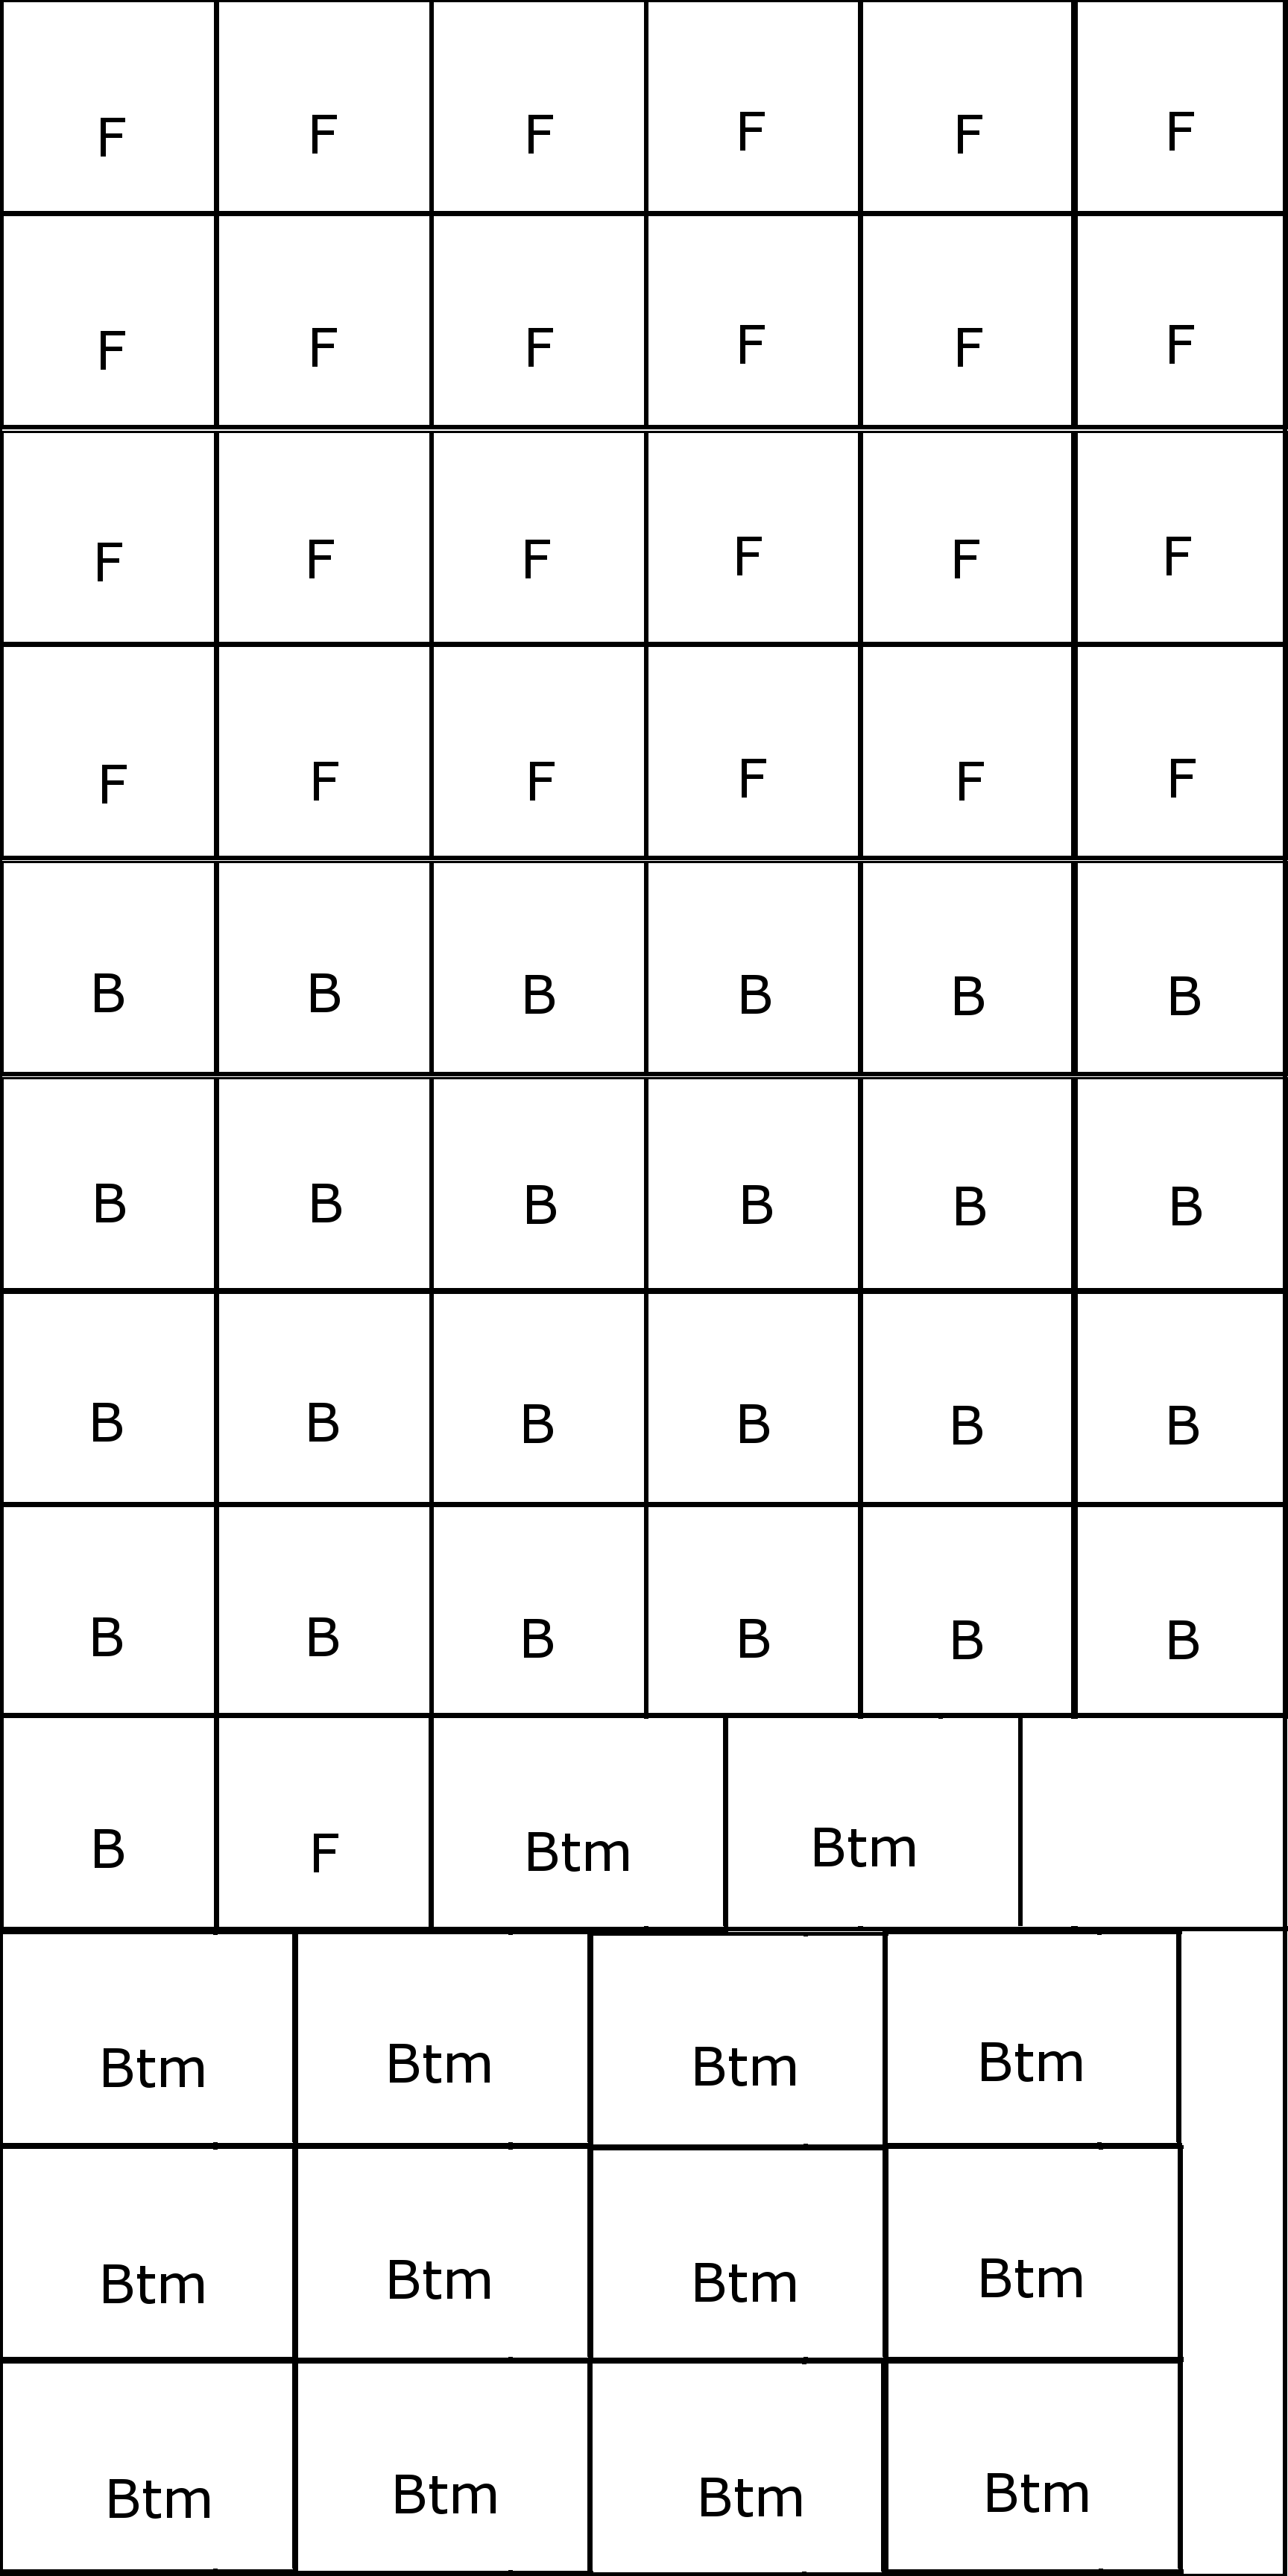
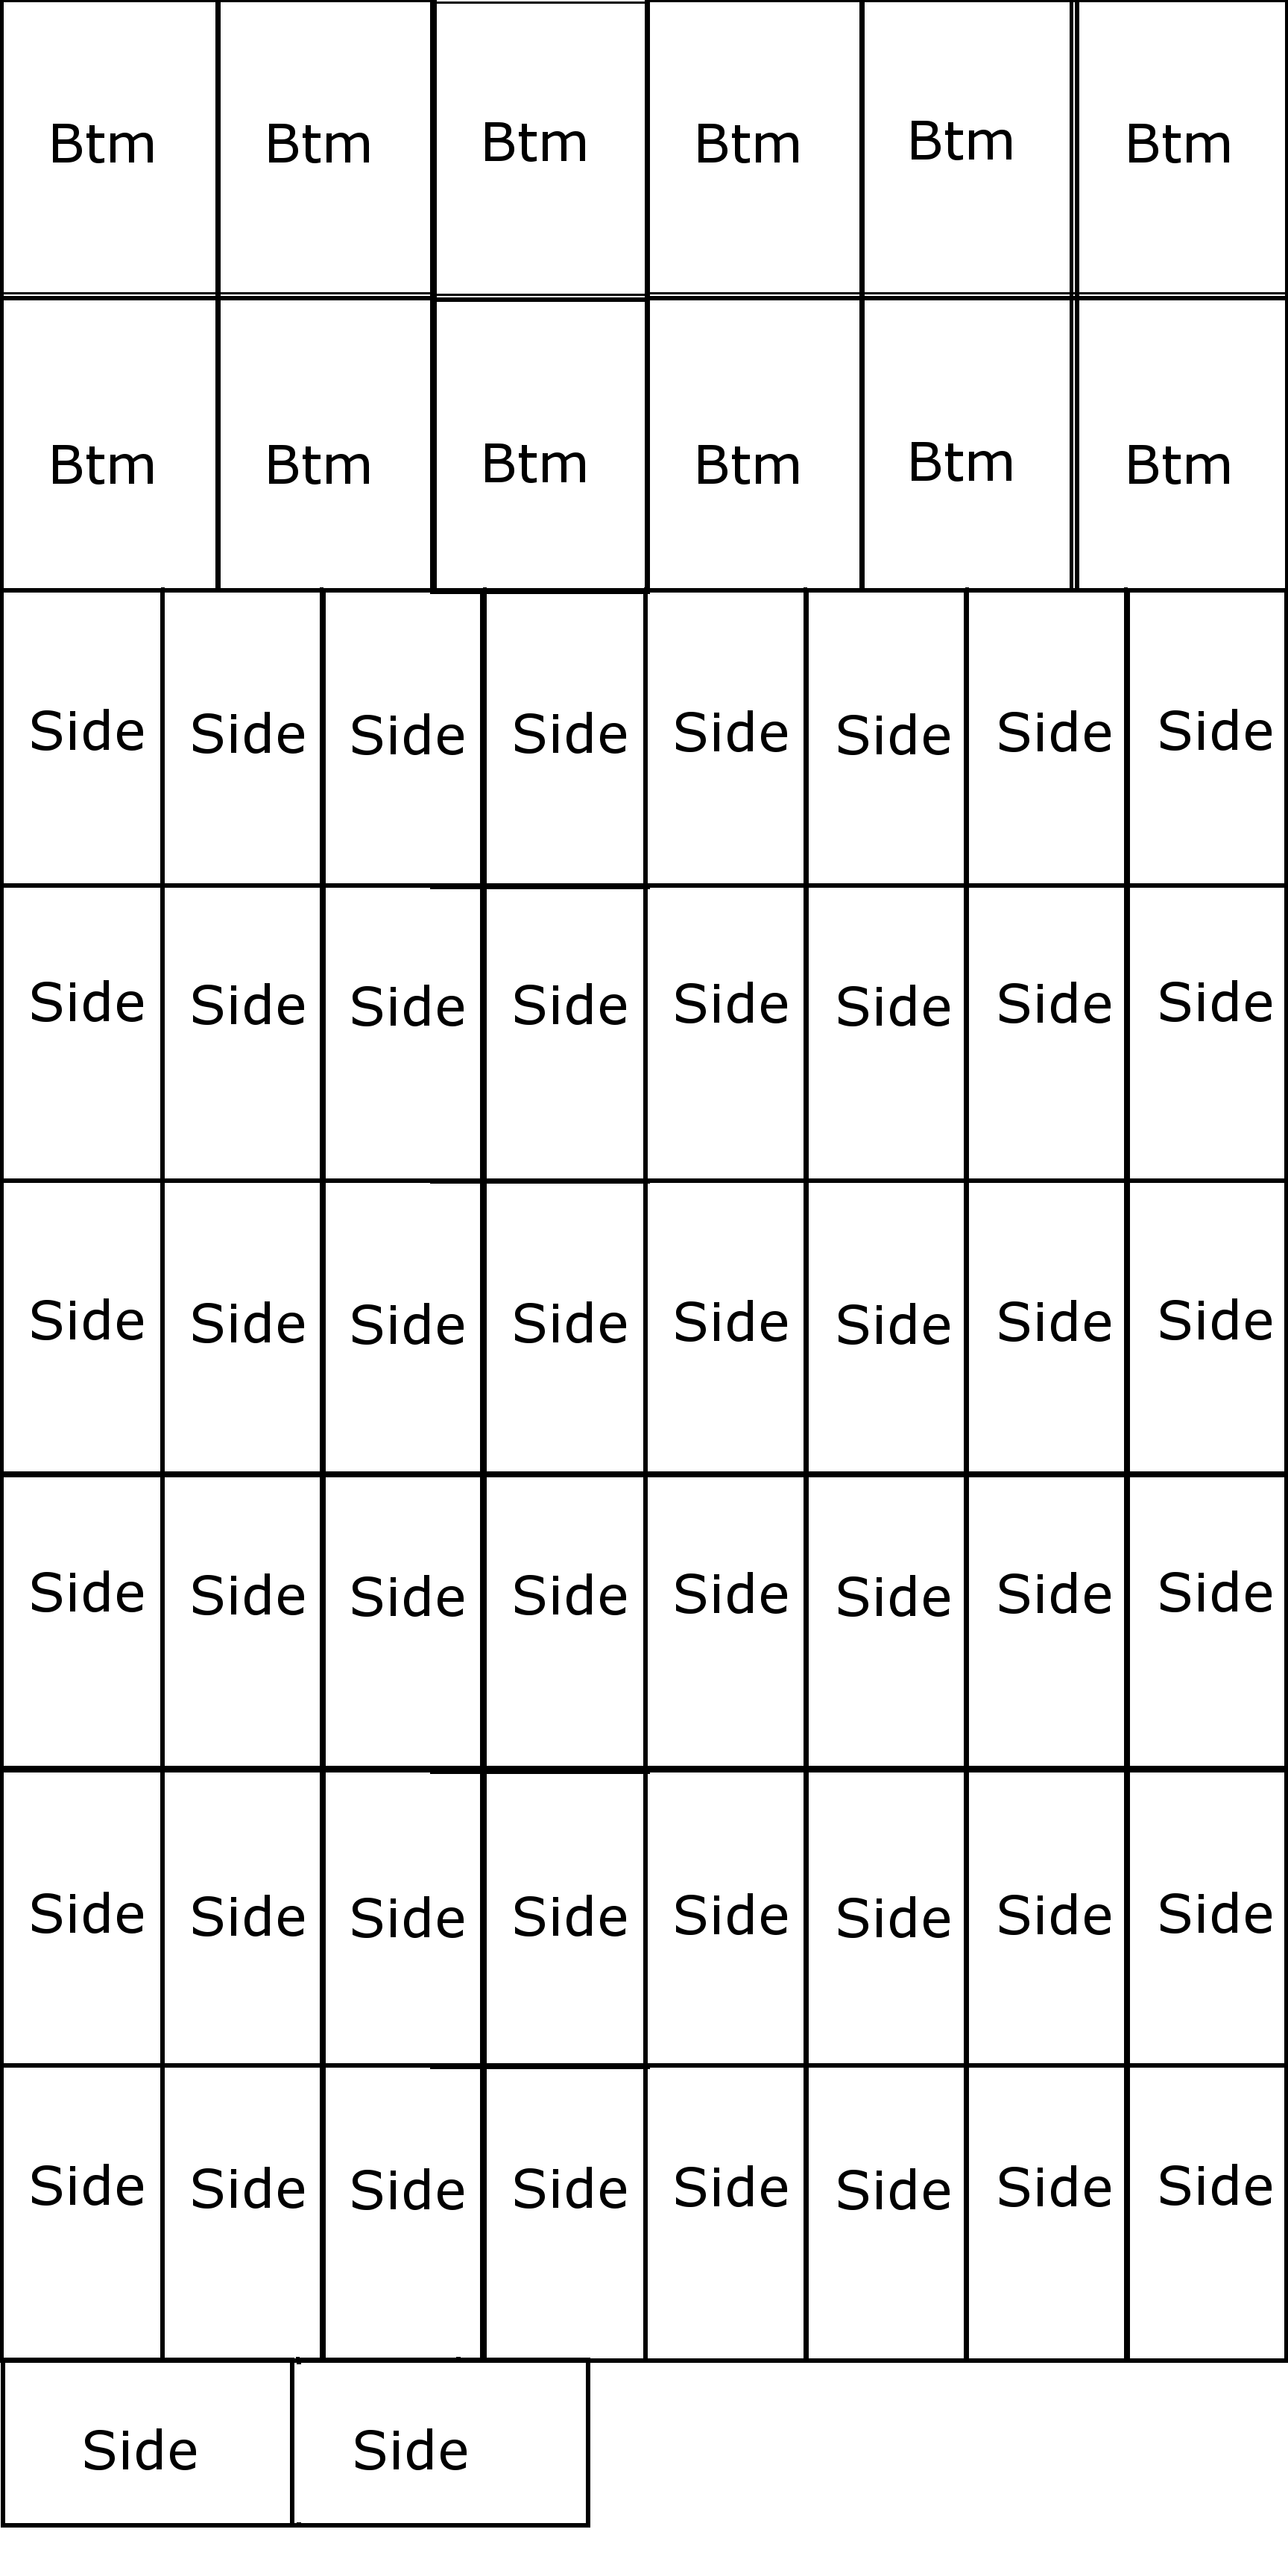
Components
| Item | Qty | Description | LxWxH | Source |
|---|
| Side |
2 |
Outer box sides |
22in x 6in x 1in |
pine trim |
| Top/Bottom |
2 |
Outer box top/bottom |
25in x 6in x 1in |
pine trim |
| Back |
1 |
Outer box back |
27in x 22in x 1/4in |
1/4in plywood |
| Shelves |
4 |
Outer box shelves |
21in x 6in x 1/4in |
1/4in plywood |
| Doors |
25 |
Inner box Fronts |
4in x 4in x 5mm |
5mm underlayment |
| Drawer Backs |
25 |
Inner box Backs |
4in x 4in x 5mm |
5mm underlayment |
| Drawer Sides |
50 |
Inner box Sides |
3in x 5.5in x 5mm |
5mm underlayment |
| Drawer Bottoms |
25 |
Inner box Sides |
4in x 5.5in x 5mm |
5mm underlayment |
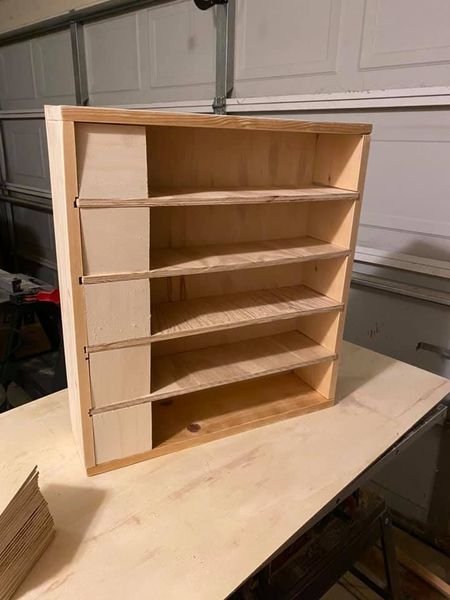
Procedure
| Step | Description |
|---|
| 1 |
Outer Box - Cutting |
| 1.a. |
- Measure and cut the sides top and bottom from 1x6 pine trim |
| Notes |
The Table saw works well for this but it can be accomplished with a circular saw and a steady hand. Make sure to pay attention to the width of the saw blade and mark accordingly. The kerf is expected to be INSIDE the measurements for the DRAWERS, to ensure they can fit without issue. The kerf is expected to be OUTSIDE the cut line for outer box measurements, so that the frame is exactly fitted together. Most table saws (and circular saws) make a 1/8" kerf.
|
| 1.b. |
- Adjust saw depth to .25" and measure and cut slots on sides for the shelves to slide into. These slots should be 1/4 inch wide, so will require either a router or multiple passes with a table saw or circular saw to create the slot. |
| 1.b. |
- Measure and cut box back from 1/4in plywood |
| 1.c. |
- Rough-sand all parts using belt sander. |
| 1.d. |
- Assemble using finishing nails and hammer. |
| Notes |
The Table saw works well for this but it can be accomplished with a circular saw and a steady hand. Make sure to pay attention to the width of the saw blade and mark accordingly.
Before assembling verify the box sides, top and bottom fit on the back. Assemble frame, then nail the back onto the frame on a sturdy surface. |
Figures
| Name | Image |
|---|
| Figure 1 |
|
| Figure 2 |
|
| Figure 3 |
|
| Figure 4 |
|
| Figure 5 |
|
| Figure 6 |
|